

Scenario:
Members of the HR user group at CCH need access to desktops running Windows 8. The desktops provided to HR users must be in a separate device collection
named HR. As part of a pilot, a Citrix Administrator must use the Provisioning Services Console to create the device collection and initially four target devices with
plans to add 20 more. The target devices named Win801T Win802. Win803 and Win804 should be assigned the CCH_Win8 vDisk and those devices should be
assigned to the HR OU. XenDesktop is NOT being used for the HR team at the moment.
The hypervisor information for the environment is:
XenServer IP Address: 192.168.10.5
Username: root
Password: Password 1
Tasks:
1. Create a device collection named HR.
2. Create four target devices named Win801, Win802. Win803 and Win804, and add the target devices to the HR device
collection.
3. Ensure the target devices are configured to meet the requirements outlined in the scenario.

Answer: See the explanation
Explanation:
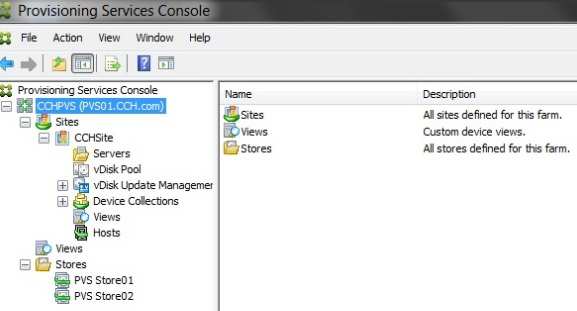
Creating a Device Collection
To create a new device collection:
1. In the Console, right-click on the Device Collections folder where the new collection will exist, then select the Create device collection menu option.The Device
Collection Properties dialog appears.
2. On the General tab, type a name for this new device collection in the Name text box, and a description of this collection in the Description text box, then click
the Security tab.
3. Under the Device Administrators list, click Add. The Add Security Group dialog appears.
4. To assign a group with the Device Administrator role, type or select the appropriate domain and group name in the text box, then click OK.
5. Optionally, repeat steps 2 and 3 to continue assigning groups as device administrators.
6. Under the Device Operators list, click Add. The Add Security Group dialog appears.
7. To assign a group with the Device Operator role, type or select the appropriate domain and group name in the text box, then click OK.
8. Optionally, repeat steps 2 and 3 to continue assigning groups as device operators.
9. Click OK to close the dialog box.
10.
Run the wizard
The wizard is run directly from the Provisioning Services Console or from a remote console.
Before running the wizard, be sure that all prerequisites are met. See the installation requirements content Requirements.1. Right-click on any Site icon in the Console tree panel, then select the XenDesktop Setup Wizard… menu option. The XenDesktop Setup Wizard appears.
2. Click Next to begin setup.
3. On the XenDesktop Host page, enter the location of the XenDesktop Host address to connect to and to configure. The most recently used XenDesktop Controller
(name or IP) is cached in the registry of the local machine running this instance of the Console.
4. Select a XenDesktop host. If you choose a cluster, machines are evenly distributed across the hosts cluster.
Note: XenServer 5.5 Update 2 virtualization settings do not display. These setting are added in XenDesktop as host connections using the Manually create VMs
option. As a result, you cannot specify a network or storage location for them, therefore it is not listed in the XenDesktop Setup Wizard.
5. Supply the host credentials (Username and Password).
6. From the list of available templates, select the template to use for the host you chose. If using a previous version of the VDA or if the template is built using
Windows XP or Windows Visa, select the checkbox. Valid templates must have a dynamic MAC address or a static address with a value (00:00:00:00:00:00 is not a
valid MAC address).
7. If there is more than one network available for the Virtualizations Settings, a page displays so you can select the appropriate network.
8. Select a single, Standard Image mode vDisk to assign to the collection of VMs.
9. Create a new catalog or use an existing catalog from a previous release (XP, Vista or Windows 7 with VDA 5.6 this must also be specified using XenDesk Studio
when the delivery group is created). VDA’s can be of either functional level. The options that display enabled depends on which catalog option you select.
o If you chose to create a new catalog, provide a name and description for that catalog. Appropriate machine types include:
Windows Client Operating System – best for delivering personalized desktops to users, or delivering applications to users from desktop operating systems.
Provides the option to save a user’s changes to a Personal vDisk.
Windows Server Operating System – best for delivering hosted shared desktops for a large-scale deployment of standardized machines or applications, or both.
o If you select an existing catalog using the drop-down menu, that catalog’s, description, machine type, assignment type, and user data (if applicable) display.
10. Select VM preferences. Preferences vary depending on the machine OS type and if assigned user changes are discarded after their session ends.
o For Windows Client or Windows Server machines that are randomly assigned to users and those users do not require a personal vDisk:
Number of VMs to create (default is 1)
vCPUs (default is based on the previously selected template)
If the template has dynamic memory configured, two additional configuration settings are required: minimum memory (default is 0 MB) and maximum memory
(default is 1000)
Local write cache disk (default is 6 GB)
Boot mode; PXE boot (requires a running PXE service). BDM disk (creates a partition for the Boot Device Manager file).
For Windows Client machines that are either randomly assigned or statically assigned to users and those users can save their changes to their personal vDisk, in
addition to the preferences listed in option “a.” above, the following preferences display:
Personal vDisk size (default is 10 GB). When booting a target device from a personal vDisk, the vDisk’s OS partition, C:\\ by default, only shows the amount of
space allocated to the personal vDisk, not the true size of the personal vDisk.
Personal vDisk drive letter (default is P). The drive letter the target device uses for the personal vDisk. The range allowed is between E: to U: and W: to Z:.
11.Choose the appropriate method for adding Active Directory computer accounts:
Create new accounts
Import existing accounts
The page that displays depends on which Active Directory method you select.
12.To Create new accounts: An Active Directory administrator needs to delegate rights to the Provisioning Services Console user to allow Active Directory account
creation or modification to manage computer account passwords.
Select the appropriate domain from the Domain drop-down box, then select from the OUs listed for that domain. The domain and OU default to those of the currentuser.
Select the machine naming option from the Account naming scheme drop-down text box. Enter a valid naming scheme consisting of at least one hash symbol
(#) that is 15 characters or less. Additionally, select a number/character fill option that will dynamically replace the hash symbols in the specified naming scheme,
incrementing by one for each VM as they are created.
13.To Import existing accounts:
Click Browse to browse for the appropriate OU to import, or click Import to import an existing .CSV file in the following format:
Name,Type,Description,
PVSPC01,Computer,,
The Required count displays the number of VMs previously specified. The Added count displays the number of entries in the list. If you import machine account
names that already exist in any of the following locations, they are not valid and do not display in the list; XenDesktop (as a machine), PVS (as a device), on the
hypervisor (as a VM). If the AD structure contains a large number of objects or containers, or you are importing a large amount of machine accounts, the import may
take awhile as it must validate that each imported account does not already exist in Provisioning Services, XenDesktop, and the destination hypervisor. If this is the
case, you should receive feedback in the form of an hour glass cursor while the import completes.
Besides, part of the new 259Q 1Y0-202 dumps are available here:
https://drive.google.com/open?id=0B-ob6L_QjGLpZGIwSDFwaGJmLUU
Best Regards!
1
0