
Scenario:
A Citrix Administrator must modify the store configuration on a StoreFront server to provide users with access to desktop OS machines and server OS hosted
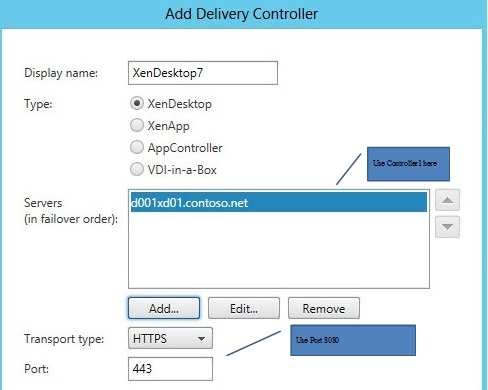
applications. A Delivery Controller named Controller-1 needs to be added to the existing site. Controller-1 will serve as the Secure Ticket Authority. The
administrator has been instructed to ensure communication with the Delivery Controllers takes place over port 8080.
Tasks:
1. Modify the store named Apps and Desktops to provide users with access to desktop OS machines and server OS hosted
applications using hostnames only. Do NOT assume the FQDN.
2. Ensure communication with the Delivery Controllers take place over port 8080.
3. Set up Controller-1 as the Secure Ticket Authority.

Answer: See the explanation
Explanation:
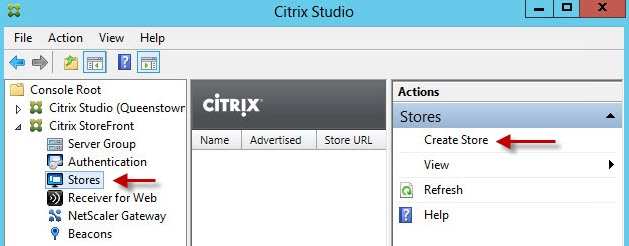
Citrix StoreFront Configuration
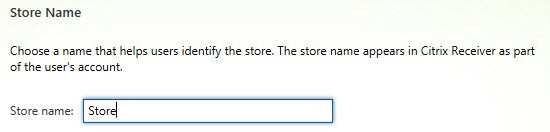
1. When the wizard starts enter a store name.
2. Now we need to add the delivery controllers (Controller1) that StoreFront will interface with
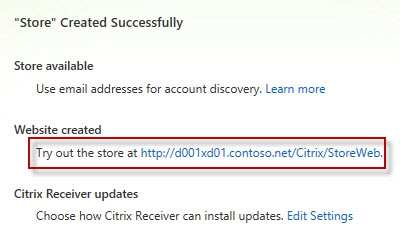
6. Once the store is created it will give you the web browser URL that you can use to access it. Also take note that to access StoreFront from a web browser you
must append “Web” to the store URL, as the URL shows below. Don’t try going to /Citrix/Store as that won’t work.
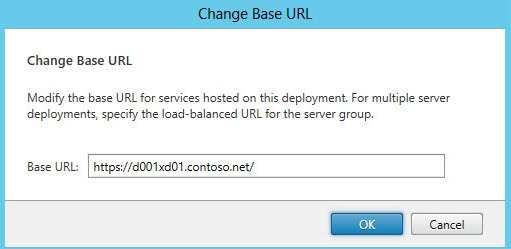
7. To change the StoreFront base URL you can go to the Server Group node and in the right pane select Change Base URL. Change URL to use HTTPS and
port 8080
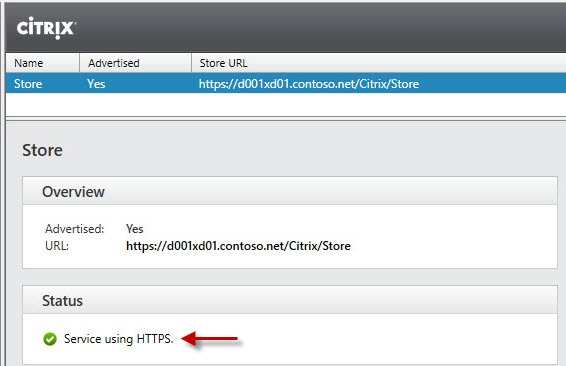
8. Back in the StoreFront console, after refreshing, you can see that the service is using HTTPS.
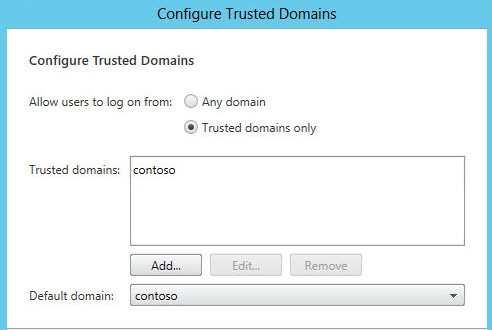
9. One quick tweak to make authentication easier is to set a default domain. This way the user doesn’t have to enter a domain when authenticating to the StoreFront
web site. Locate the Authentication node, then in the right pane click on Configure Trusted Domains.
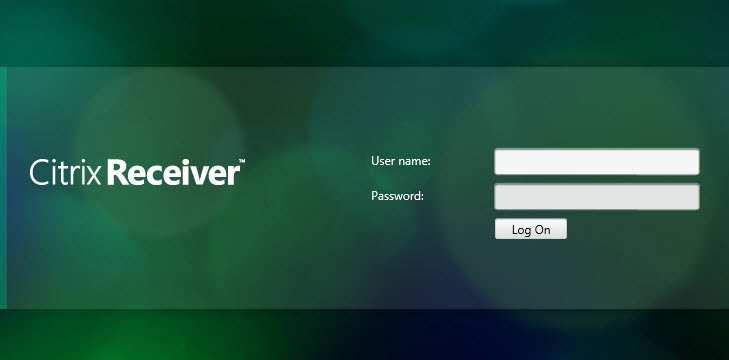
And that’s pretty much it to get an operational StoreFront. If you open your browser and go to the full web store URL you should get a green bubbly Citrix receiver
page.
Creating a XenDesktop 7 Delivery Group
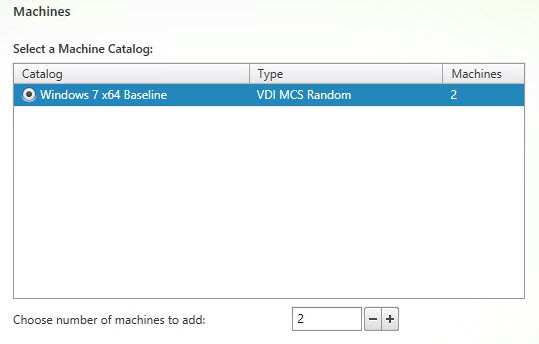
1. When a new Delivery Group is created it will list all of your machine catalogs. It lists the number of computers in that catalog and one can choose how many to
assign to my delivery group. You need not put all of the computers into a single delivery group.
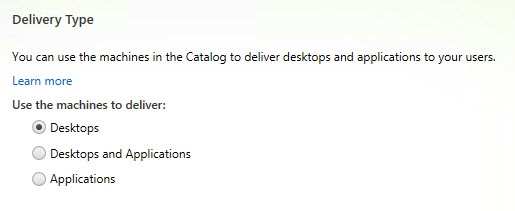
2. Next up choose what combination of desktops and applications you want to deliver. But here you could assign the same desktop VM to everyone, but have
different delivery groups that customize the mix of XenApp applications they get delivered.
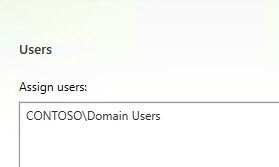
3. Now you have to define what users or groups are part of the delivery group.
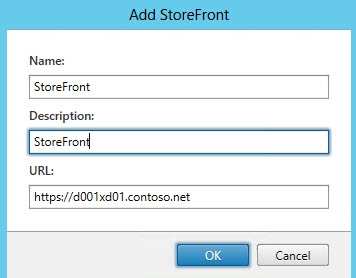
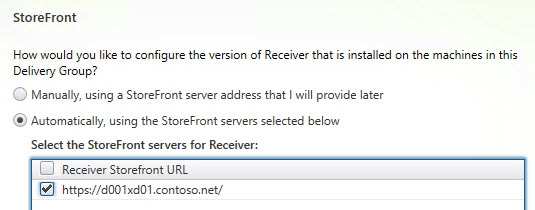
4. An optional step at this point is to define the StoreFront server(s) which the Receiver inside of the desktop will be configured to use. A great feature if you are
using XenApp, or perhaps have another XenDesktop farm for R&D that some users should have access to.
5. The final step is configuring a Delivery Group name, and a display name. The display name is something users will see, so keep it simple.
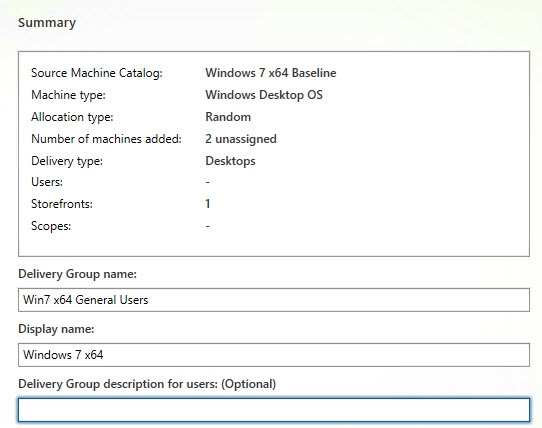
6. And that’s it! A few seconds later you will have a nice delivery group in your console. In the right hand column make sure your VMs show a Registered state. If
not, then you may have some networking (DHCP, DNS) or other issues preventing the VDA from properly communicating with the desktop controller.

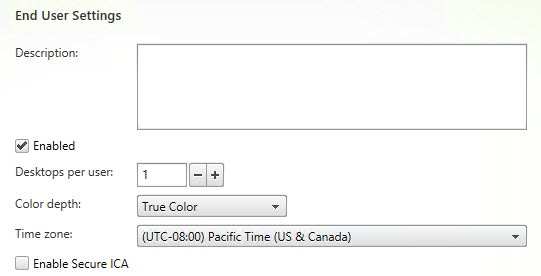
7. Once the delivery group is created, you can Edit it and find more options that weren’t presented during the simplified wizard. For example, you can allow a user to
access more than one desktop from the pool, change the color depth, time zone, and secure the ICA protocol with some lightweight encryption.