

Your network contains a server that has the Remote Desktop Session Host (RD Session Host) role
service installed. You need to ensure that each Remote Desktop connection to the server has a
unique IP address. What should you do?

A.
Enable IP virtualization per session
B.
Enable IP virtualization per program
C.
Configure the network adapter to have multiple IP addresses
D.
Configure the network adapter to obtain an IP address automatically
Explanation:
Deploying Remote Desktop IP Virtualization
In Windows Server 2008 R2, RD Session Host supports per program and per session Remote Desktop
IP Virtualization for Winsock applications. When using per program Remote Desktop IP
Virtualization, you choose which programs to use with Remote Desktop IP Virtualization. When using
per session Remote Desktop IP Virtualization, all Winsock applications are virtualized with Remote
Desktop IP Virtualization. Remote Desktop IP Virtualization allows you to assign a unique IP address
to a user session, which helps to avoid application compatibility issues by simulating a local desktop.
To configure Remote Desktop IP Virtualization for per program virtualization
1. Log on to RD Session Host as an Administrator.
2. Click Start, point to Administrative Tools, point to Remote Desktop Services, and then click
Remote Desktop Session Host Configuration.
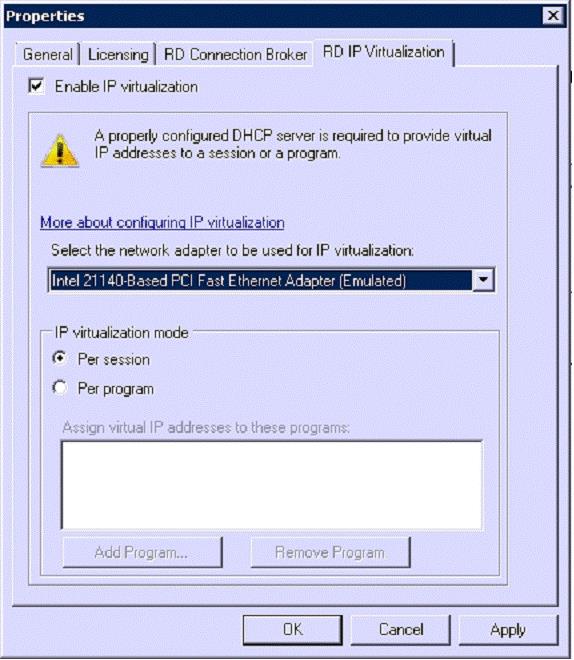
3. Under the RD IP Virtualization heading, double-click IP Virtualization.
4. Click the Enable IP virtualization check box.
5. In the Select the network adapter to be used for IP virtualization box, select the appropriate
network adapter.
6. Under the IP virtualization mode heading, ensure that the Per Session option is selected.
Important If your computer has more than one network adapter, you must choose per program.
Using per session Remote Desktop IP Virtualization with more than one network adapter installed on
the computer is not supported.
7. Click OK.
Source: http://technet.microsoft.com/en-us/library/ee308293.aspx
